Part 4 Adding a TextBox to the Workflow Designer
We will add a TextBox control to the hosted Workflow designer that will serve as a
XAML code viewer. This will allow us to see the XAML source code as the
workflow is edited.
- Open Microsoft Visual Studio 2010 from Start | All Programs | Microsoft Visual Studio 2010 | Microsoft Visual Studio 2010.
- Open the project from last post Building a Composite Activity Designer part(3 - 4).
- Add
the TextBox to the designer window.
To do this, open MainWindow.xaml in
the XAML editor and replace the
current
element with the following code (shown in bold). XAML<Window ...><Grid><Grid.RowDefinitions><RowDefinition Height="4*" /><RowDefinition Height="*" /></Grid.RowDefinitions><Grid Name="grid1"><Grid.ColumnDefinitions><ColumnDefinition Width="1*" /><ColumnDefinition Width="4*" /><ColumnDefinition Width="1*" /></Grid.ColumnDefinitions></Grid><TextBox Grid.Row="1" Height="250" Name="textBox1" VerticalScrollBarVisibility="Visible" /></Grid></Window> - Wire
up the ModelChanged event from the Workflow Designer to force it to write the current XAML to its buffer (WorkflowDesigner.Text property). To do
this, in Solution Explorer
right-click MainWindow.xaml and
select View Code. Add the following
method to MainWindow class:C#private void AddXamlTextBox(){wd.ModelChanged += ((s, e) => wd.Flush());}Visual BasicPrivate Sub AddXamlTextBox()AddHandler wd.ModelChanged, (Sub(s, e) wd.Flush())End Sub
- Call
the method from the MainWindow
constructor. To do this, add the following code (shown in bold) to the constructor:public MainWindow(){InitializeComponent();this.RegisterMetadata();this.AddDesigner();this.AddToolBox();this.AddXamlTextBox();this.AddPropertyInspector();}Visual BasicPublic Sub New()InitializeComponent()Me.RegisterMetadata()Me.AddDesigner()Me.AddToolBox()Me.AddXamlTextBox()Me.AddPropertyInspector()End Sub
- Set the HostingApplication project as startup project. To do this, right-click HostingApplication project in Solution Explorer and select Set as StartUp Project.
- Press CTRL+F5 to run the application.
- Drag
a MyTryCatchFinally activity from
the Toolbox and drop it in the Sequence
designer surface.
 Adding a TryCatchFinally activity
 - Drag
two Prompt activities from the
Toolbox and use them as Try and Finally activities respectively.
 Adding Prompt activitiesNote: Notice that the workflow XAML is being displayed in the TextBox at the bottom of the window.
 - Remove the TryCatchFinally activity. To do this, click over the activity surface and press Delete.
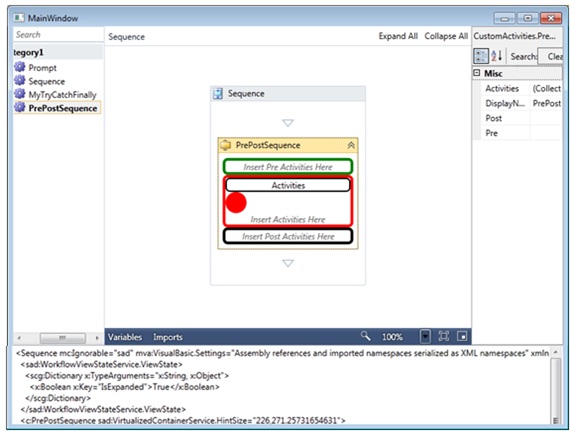
- Drag
a PrePostSequence activity from the
Toolbox and drop it into the empty sequence.
 Adding a PrePostSequence activity
 - Drag
and drop Prompt activities into the
Pre and Post sections of the PrePostSequence
activity.
 Adding Pre and Post Activities
 - Drag
several Prompt activities into the Activities section of the PrePostSequence activity.
 Adding Activities
 - Close the window to end this verification.


No comments:
Post a Comment